
Downloading FileZilla
Go to the FileZilla home site and click on the download button.
Installing FileZilla
Once the download is complete, double-click on the .exe file. After responding to the usual License agreements, you will be presented with the an installation options screen, that lets you choose whether to install Filezilla for all users of the computer or just for you...
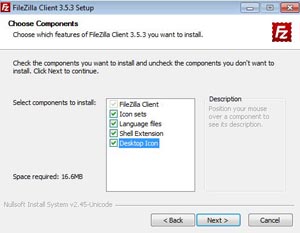
...and also a screen that lets you choose what components to install.

The FileZilla Interface
Important components of the FileZilla window are:
- Menu Bar: File>Site Manager and Server>Disconnect
- Icon Bar: Site Manager (first icon on the left) and Disconnect (large red X)
- Status Pane: information about your connection
- Local Site/Remote Site: Directory pane on top; file listing pane below
- Transfer Pane: information about individual file transfers

Creating a NetFiles Connection and Connecting to Netfiles
The first time you try to connect to Netfiles, you need to create a Filezilla site. Click on the Site Manager icon or select File>Site Manager from the menu:
In the Site Manager window:
- Click on New Site.
- In the Select Entry box under My Sites, replace "New Site" with your name for this site
- In the Host box, type: sftp.netfiles.willamette.edu
- In the Protocol box, select SFTP - SSH File Transfer Protocol
- In the Logon Type box, select Ask for password (recommended) or Normal
- If you selected "Normal," type your password in the Password box
- Click the Connect button
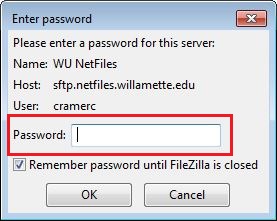
If you selected the "Ask for Password" option, you will be prompted to enter your password.
Once you have created a site, all you need to do is open the Site Manager window, select the name of the site and click the Connect button.

Security Warning
The first time you connect to Netfiles, you may receive a security warning. This is expected. You can check the Always trust this host box and click the OK button.

Viewing Files on NetFiles
Once you have connected to NetFiles, the FileZilla window Remote site will contain a listing of all the files you have stored on the Netfiles server in the right-hand directory pane. Any existing folders may contain a '?' when you first connect; clicking on the folder name will display the contents of the folder and remove the '?' if you have permission to access that folder.
Navigate using the Directory view in the "Remote site" pane or by clicking on folder names in the file viewer pane below it. The folder icon followed by 2 dots at the top of the file listing will move you up one level in your folder hierarchy.

Transferring Files
Drag and drop files to/from the Local and Remote file listing panes in the FileZilla to upload files to Netfiles or download files to the local computer. If a file already exists at the destination, you will be prompted to choose an option for how to proceed.

Disconnecting from Netfiles
To disconnect from Netfiles, click the icon with the large red 'X' or select Server>Disconnect from the Menu bar.

Need More Help?
You can find help on the Filezilla help pages or contact the WITS Help Desk at 503-370-6767.